It’s amazing how much easier it is to do anything when you have the right information.
I did some painting around my place last week, and luckily a friend of mine owns a painting company. And even though I’ve done a little painting here and there before, a little supervisory consultation with him made the job a lot easier.
So if you’re thinking of painting your house, these pro tips will come in handy …
1. Surface Preparation. First, wash your walls with TSP (Trisodium Phosphate). This is what most painters use but it’s also rather harsh. A good alternative is to use dish detergent and warm water. Just make sure you rinse the detergent residue off with a second washing of fresh water. If you’re painting a surface with a semi-gloss finish, then give it a light sanding.
2. Other Preparation. The goal is to get the job done as quickly and easily as possible. So you want to keep any masking with tape to a minimum. Remove the covers for light switches and electrical outlets and cut as much as you can with a brush when it comes to fixtures. You also want to clear the room out completely; it’s a real hassle (trust me on this) trying to work around furniture, etc you’ve piled up in the center of the room.
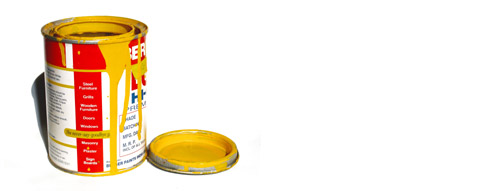
3. Get Good Paint. Not all paint is created equal. The main difference is pigment content. Quality paints contain more pigment and although you’re going to pay about 50% more for a good can of paint, the price is well worth it. You’ll get full coverage in 2 coats, whereas your average house paint will require 3 or even 4 coats.
4. Brushs. A thick 4 inch brush is best for cutting your trim. A lot of people might think that’s too big but there are a number of reasons to go bigger … you can actually cut a more even line with a big brush. You’ll also create a wider cut line which will make rolling a breeze afterwards. And of course, bigger brushs hold more paint which will speed up the job considerably. Make sure your brushes are made for acrylic latex (assuming) and not oil.
5. Rollers. A 10mm roller for walls is pretty standard. For painting a popcorn ceiling or rougher surface, go with a 15mm roller. And like brushes, rollers are made for either oil or latex so check the label. Another handy tool is an extendable roller pole. These are good for reaching high but also for leverage; you can apply more pressure without the exertion.
6. Other Tools. Always get tray liners for your trays and go with a deep tray; more paint, less going back and forth. A damp cloth is another good thing to keep on hand for cleaning up those drips and mistakes on the fly while the paint is still wet. Drop sheets are another essential. You can use poly sheeting which is cheap or get some actual painting drop sheets which are quite a bit easier to work with because they don’t slide around and they absorb any paint that spills on them.
7. Quick Cleanup. Let’s assume this is going to be a multi-day job. You don’t have to wash all your brushes and rollers at the end of each day. Just fill the tray up with paint and leave your brushes and rollers in the tray. Wrap the whole thing up in a garbage bag and it’ll be fine and ready to roll the next day. This is a massive time saver at the end of each day.
So there you go. These tips will help you save time and make your next painting job go a little smoother.